Netgear Nighthawk RS600 Setup: Learn Quick Steps Here!
The Netgear Nighthawk RS600 routers define the wifi7 technology that provides you with an impeccable network. Likewise, to experience such a reliable internet, the Netgear Nighthawk RS600 setup is the initial step to take. This will give you authorized access to customize the router.
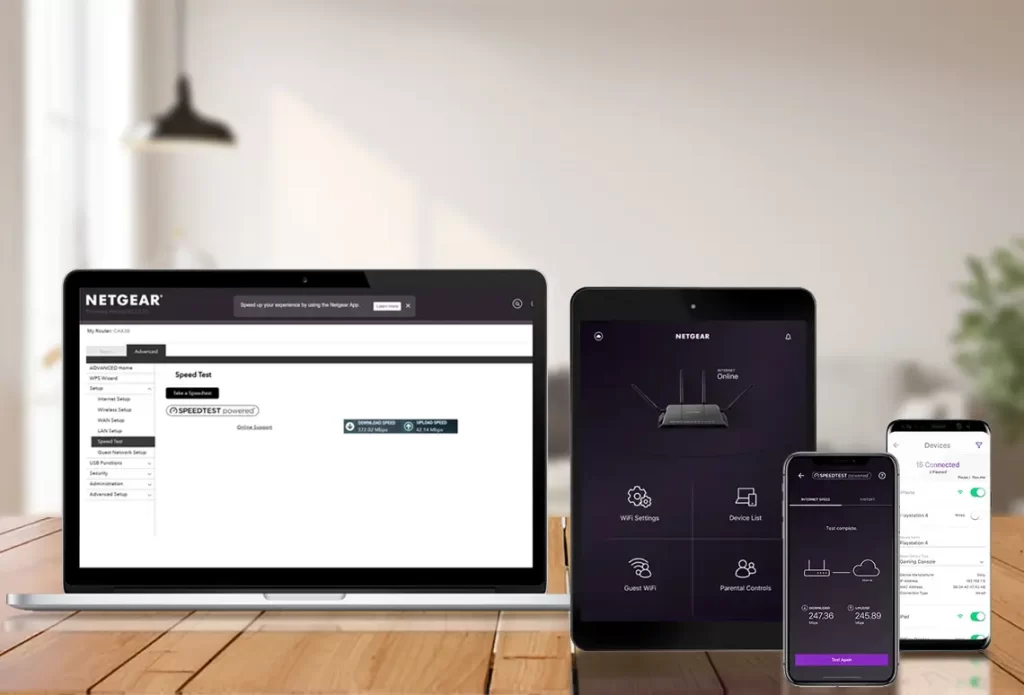
Likewise, configuring this wifi 7 networking device is possible through the web GUI and the application methods. Additionally, to find out the detailed steps for the Netgear RS600 Nighthawk wifi 7 router configuration, delve deeper into our comprehensive guide. Also, you can walk through the firmware update, so keep reading to explore further!
How to execute the Netgear Nighthawk RS600 setup?
Generally, a faster and secure internet connection is the primary need for work and entertainment. However, to access and manage your personal Netgear RS600 Nighthawk wifi 7 router network, you need to access and configure it first. Therefore, to execute the setup for wifi7 router, one must follow the instructions discussed below:
Web Portal (routerlogin.net)
- Initially, connect your computer/laptop to the Netgear router’s network.
- Now, open the web browser and type routerlogin.net web address in the browser bar.
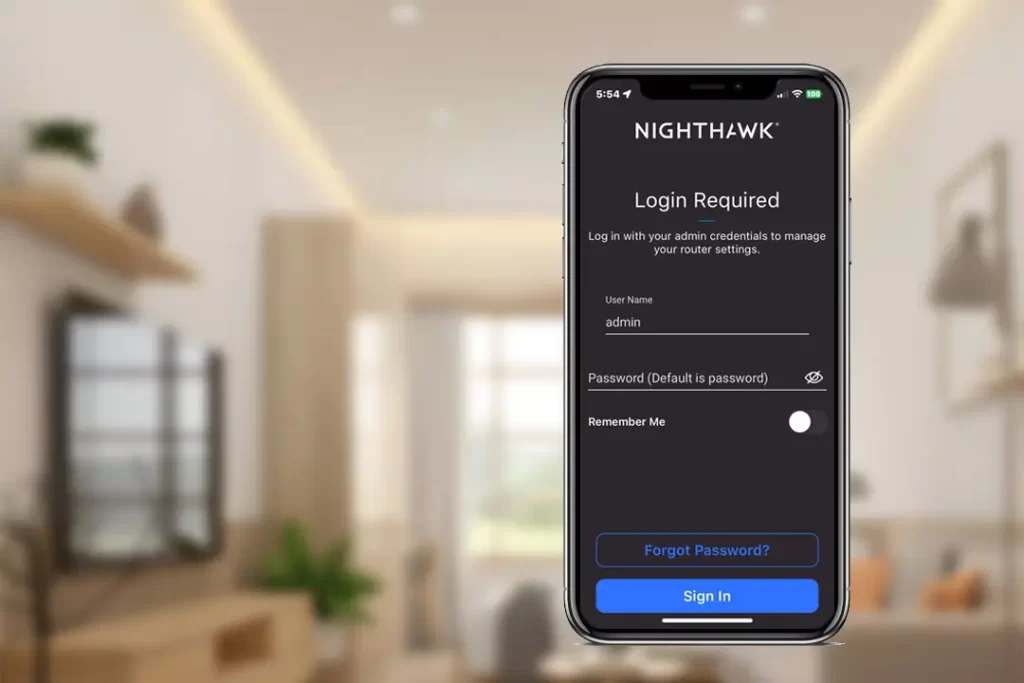
- Enter the admin credentials on the login window that appears to you.
- After logging in, you visit the Netgear Nighthawk RS600 setup wizard.
- Hereon, click on the Advanced>Setup Wizard>Yes>Next.
- Now, you are asked to create a new Admin password and confirm it.
- Further, answer the two security questions and tap on Next.
- You see a Congratulations page that shows a successful connection.
- Now, visit the Basic home page and click on Wireless.
- Here, edit the SSID and Password (Network Key) sections and change the network name and password.
- Moving further, go to the Advanced settings and configure them accordingly by following the on-screen instructions.
- Click on Save/Apply to secure the settings you made recently.
- Finally, the Netgear Nighthawk RS600 setup process ends successfully.
Nighthawk Application
- To begin with, link your smartphone to the Netgear RS600’s network.
- Now, confirm that you have an upgraded version of the Nighthawk application.
- Afterward, run the application and enter the accurate user details to access the admin account.
- Now, you land on the Netgear Nighthawk RS600 setup dashboard of the router.
- Here, click on your router’s image and then on the Settings.
- Go to the WiFi Settings and change the network name and Password for your network.
- When prompted, generate a new Admin password and confirm it.
- After that, explore the Advanced Settings and configure them according to your preferences.
- Further, tap on the Apply/Save to implement the recent changes.
- In the end, you are done with the Netgear RS600 router configuration.
What are the quick steps for the Netgear RS600 firmware update?
Additionally, the Netgear router firmware update is a crucial process to add an extra layer of security to your networking device. Likewise, this will upgrade the router functions and eliminate bugs. Moving back to the point, if you want to learn the Netgear RS600 firmware update, then follow the steps mentioned below:
- First and foremost, activate the Nighthawk app on your smartphone.
- Now, access the admin account by typing in the valid user credentials on the login screen.
- After logging in, you reach the home dashboard of the router.
- Here, click on the Router Settings>Check for Updates by scrolling down.
- If a window prompts for the new update, then click on Update.
- After that, follow the on-screen guidelines to proceed further with the firmware update.
- Also, do not turn off the smartphone or the router until the procedure gets complete.
- After updating the firmware, the router will restart itself, so wait patiently.
- Lastly, the Netgear router firmware update finishes.
Troubleshooting Tips to resolve the Netgear Nighthawk RS600 setup issues
Commonly, the setup process is quite simple for the wifi 7 router. Likewise, users sometimes encounter issues while they are setting up their networking devices, such as login failure, network issues, outdated firmware, etc.
On the other hand, it is necessary to resolve these problems to smooth the setup procedure. In addition, we share a few of the effective troubleshooting tips for fixing these types of errors, take a look beneath:
- To start with, stabilize the internet connection by connecting an Ethernet cable.
- Look at the cable connections as these are linked properly, and none of the cords are damaged.
- Cross-check and write the accurate web address & admin details before entering them.
- Eliminate the signal barriers, such as mirrors, furniture, microwaves, cordless phones, etc.
- Temporarily disable the security extensions, like AdBlocker, Firewall, etc., until you complete the Netgear Nighthawk RS600 setup process.
- Power cycle the router to get rid of the technical glitches and bugs.
- Check the window for the firmware update. If it pops up for an upgrade, then follow the instructions or check the above section.
- Resolve the web browser issues by removing the unnecessary data from it, like cookies, cache, etc. If it does not respond to the preferred web browser, then choose another browser.
- Enable all the necessary permissions on the Nighthawk app.
- If none of the discussed methods work, then factory reset Netgear Nighthawk RS600 router. This will bring your networking device back to its original settings.
All in all, this informative page will provide you with deeper insights into the Netgear Nighthawk RS600 setup, including the firmware update. Also, you can walk through the quick fixes to resolve the setup issues. For more information, connect with us!
FAQs
The default username is “admin” and the password is “password” in lowercase.
Yes, you can easily connect your new Netgear Nighthawk router to the existing networking device.
The WPS is another way to set your router up, except for web browser and application methods.